This tutorial will teach you how to transfer files between an Amiga and a PC.
The following example is for an Amiga500 computer with at least 1mb of RAM.
I'm not a computer guy so I will try explain it the easiest way possible.
Ok, here is what you need:
- An Amiga 500 computer with 512k expansion RAM (1mb RAM total)
- A PC with serial port
- A Nullmodem cable (you can make your own pretty easy)
- A Workbench 1.3 or 1.2 disk
- Amiga Explorer program for PC
-----------------------------------------------------------
Ok, I'll assume that you have an A500 computer with at least 1mb RAM connected to a monitor or a TV...

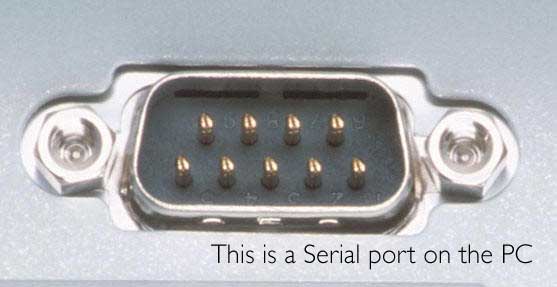
...and that you have a PC with serial port (pretty common), The one shown here is a 9 pin serial port, Maybe you have a different one like a 25 pin serial port, that's ok.
Also I'll assume that you have a working copy of Workbench on a 3.5" floppy disk...

...The last things you'll need are the Amiga Explorer software for PC...

...and a null modem cable also is needed for comunication between computers, (You can make your own, it's very easy)
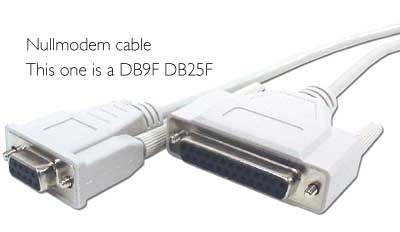
Follow this link to make your own Nullmodem cable.
If you already have one please continue...
------------------------------------------------------------------------------------------------------
First of all connect the null-modem cable to Amiga serial port and PC serial port, then turn on both computers.
STEP 1:: Setting the Serial port on Amiga
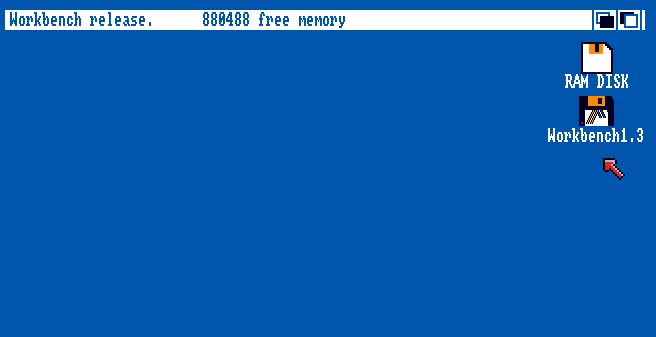
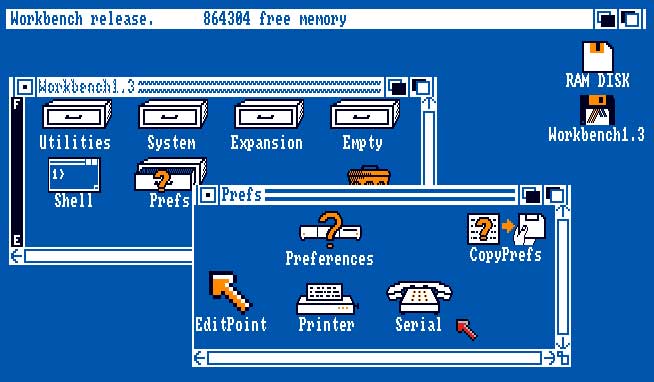
The first thing you need to know is load your Workbench disk on your Amiga, when it finish loading double click on the Workbench disk icon to open it. So far pretty easy don't you think!!
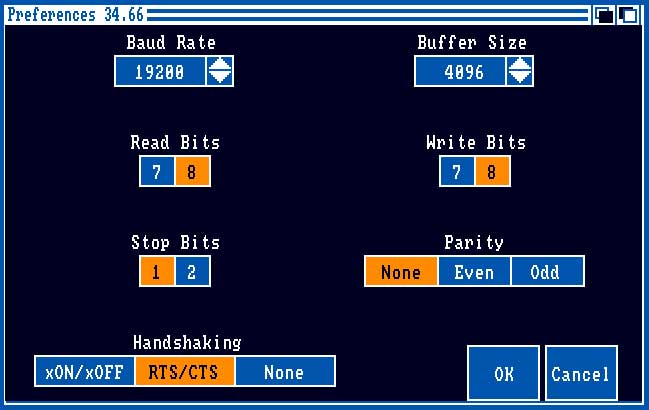
Then open Prefs and then open Serial...

Now on the Serial settings put these values. Then select OK, then select USE. Settings will be kept on RAM.
STEP 2:: Setting the Serial port on PC
This is even easier, on the PC open Control Panel > System > Hardware > then choose Devices Administrator
and select Port > COM1 Port > Port Configurations. Put these values on the fields:
note: in english is Bits per second, Data Bits, Parity, Flow control. "Ninguno" means None.

STEP 3:: Opening Amiga Explorer
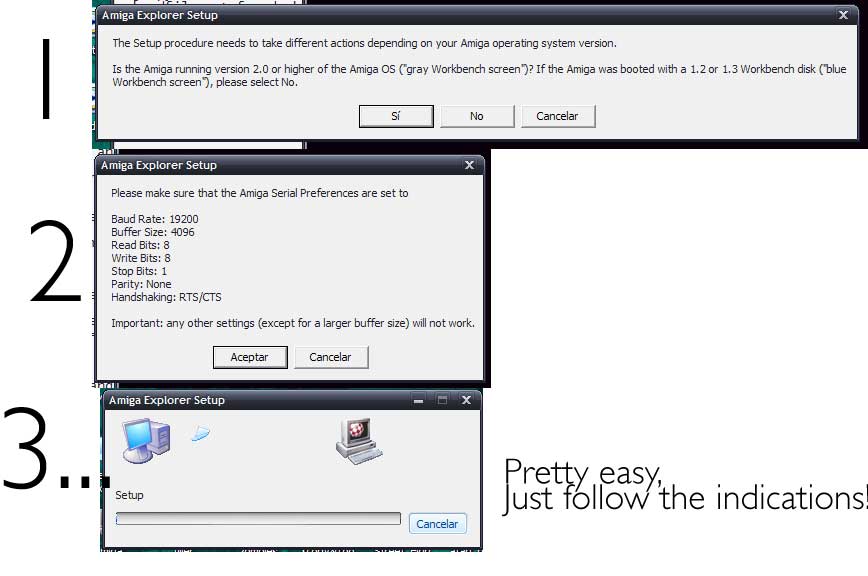
Install Amiga Explorer, then right click the icon on the desktop and select Setup.
Now follow the indications that the program shows, they are pretty clear.
Here I show you some the steps:
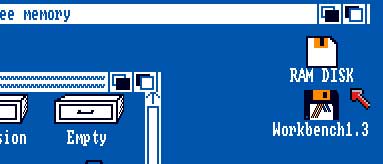
All these steps is for transfer Amiga Explorer to your Amiga RAM so you can use it or copy it to a an Amiga floppy.
Now you must open the RAM DISK icon on your Amiga and inside you'll find the Amiga Explorer program!
With AExplorer open on your Amiga now double click the AExplorer icon on your desktop PC, it should look like this:
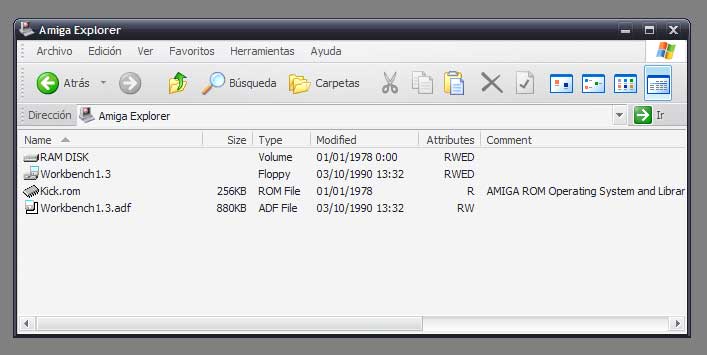
Now you can view your Amiga from your PC as a folder!
From here you can drag n' drop files between computers. You can create ADF's files draggin' to your PC desktop, or you can copy ADF's files to your Amiga disks draggin' an ADF file to your floppy drive. I't very simple!
The internet is full of places where you can download adf files.
I hope this tutorial helps you, any doubts, questions are welcome here!
If you find the tutorial useful and want to buy me a coffee just click the donate button! It will be very appreciated!! |
Some useful links:
The Big Book of Amiga Hardware
ADFDump
Herzlich Willkommen auf www.a1k.org
rob's amiga pages
English Amiga Board - Powered by vBulletin
Foro retrocomputacion.com - Imprimir página
Software Hut : Amiga Products
A.S.T. Amiga Page
TRES MODOS DE RESOLUCIÓN GRÁFICA 320x200 ó 400
Z80 RetroHard :: Ver tema - Como transferir adf al amiga 500 con solo 512kb